Introduction to HTML Forms
किसी भी webpage पर अगर आप User से कोई information लेना चाहते है तो इसके लिए आप HTML forms का Used करते है। Example के लिए जब भी आप कोई New email id create करते है तो सबसे पहले sign up form भरते है। ऐसा करके आप अपनी information webpage के द्वारा provide करते है।
Get Information From User
Forms User से input प्राप्त करने का सबसे common तरीका होता है। कोई भी form यूज़र से input लेता है And जब User उस form को submit करता है तो ये All information किसी database में store कर ली जाती है।
User से information input करवाने के लिए आप कई प्रकार के form elements Use कर सकते है। जैसे की text-box, radio button, drop-down list Etc।
<form> Tag
किसी भी webpage में forms create करने के लिए आप <form> tag use करते है। ये container tag होता है जो पुरे HTML form की beginning और ending define करता है। from tag के अंदर अलग अलग form elements define किये जाते है।
Example
<html>
<body>
<form>
First Name
<input type="text" name="First Name">
<br>
</tr>
<tr>
Last Name
<input type="text" name="First Name">
<br>
</tr>
</form>
</body>
</html>
Output


Output

Creating Buttons

Creating Radio Buttons
Example
Creating Drop Down List


Creating Check
Boxes


action
इस attribute से आप define करते है की form submit होने पर क्या करना है। जैसे की यूज़र के form submit करते ही आप कोई दूसरे HTML webpage में Hello world message show कर सकते है or कोई php script execute करवा सकते है।
method
इस attribute से आप data को store करने का method define करते है। इस attribute की only 2 values GET या POST हो सकती है।
target
form submission के बाद जो window show होगी वह target को define करते है।
Example
<html>
<body>
<form action="/action_page.php">
First name
<input type="text" name="FirstName" value="Ram">
<br>
Last name:
<input type="text" name="LastName" value="Kishan">
<br>
<input type="submit" value="Submit">
</form>
<p> "सबमिट" बटन पर क्लिक करें and the form data will be sent to a page on the server called "/action_page.php"</p>
</body>
</html>
Output


<input> Tag Attributes
Form elements आप HTML <input> tag के द्वारा define करते है। इस tag के कुछ attributes होते है जो आप elements को configure करने के लिए यूज़ करते है।
name
इस attribute से particular form element का name define किया जाता है।
बाद में यही नाम server पर values को store करने के लिए use किया जाता है।
type
ये element का type show करता है। इससे ये भी पता चलता है की किस तरह की value input की जा सकती है। जैसे text-boxes के लिए type text होता है।
size
इससे आप किसी form element की size width में define करते है। जैसे की आप any text-box को अपने according width दे सकते है।
value
Value किसी element की default value हो सकती है। जैसे की आप किसी text box के अंदर first name लिखा हुआ देखते है।
Creating Text Boxes
HTML में forms के लिए text-boxes create करना बहुत ही easy है। इसके लिए आप <input> tag के type attribute में text value define करते है।
कोई भी default value देने के लिए जो text-box के अंदर show होगी आप value attribute use कर सकते है। अगर आप password input करने के लिए text-box बना रहे है तो type password देना होगा।
Example
<!DOCTYPE html>
<html>
<head>
<title>Text box</title>
</head>
<body>
<form>
Enter email :
<input type="text" value="Email..." size=" 24">
<br>
<br>
Enter password :
<input type="password" value="Password..." size="20">
</form>
</body>
</html>

Creating Buttons
HTML forms में आप four typs से buttons create कर सकते है। इसे आप type attribute के द्वारा define करते है।
Submit – ये button form submit करने के लिए use किया जाता है। ये button पुरे form के सभी elements की values को एक साथ server पर send कर देता है।
Reset –: इस button को पुरे form के all fields की values को reset करने के लिए use किया जाता है।
Normal button – ये साधारण बटन होता है जिस पर click होते ही आप कोई भी actionले सकते है।
Image button– इस type के button में आप button के background में कोई image दे सकते
<html>
<head>
<title>Button</title>
</head>
<body>
<form>
<input type="submit">
<input type="reset">
<input type="button" value="Click here">
<input type="image" src="tempsnip.png" alt="img loading error">
</form>
</body>
</html>
Output

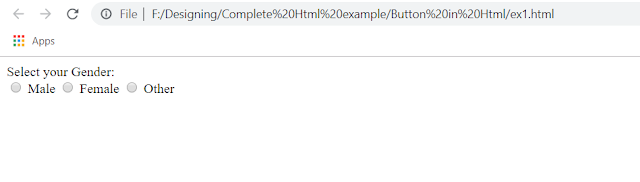
Creating Radio Buttons
<br>Radio buttons के द्वारा user बिना keyboard के webpage को information provide करता है। Radio button is a round box जिसे choose करके user अपनी choice बताता है।
अगर आप user के gender के बारे में जानना चाहते है तो आप 2 radio buttons create करके उनके नाम male और female दे सकते है। यूजर इनमे से कोई भी choose करके अपना gender बता सकता है।
अगर आप 2 या 2 से अधिक radio buttons को name attribute के द्वारा connect कर देते है ताकि user एक time पर केवल एक ही radio button select कर सके। जिन radio buttons को आप आपस में connect करना चाहते उनके आप name same देते है। Radio button create करने के लिए आप <input> tag के type attribute की Values Radio देते है। Name attribute में radio button का नाम दिया जाता है।
जैसा की मैने ऊपर बताया यदि आप Radio buttons का group बनाना चाहते है ताकि user एक बार में सिर्फ एक ही radio button select कर सके तो ऐसी situation में आप all radio buttons को एक ही नाम देते है।
Example
<!DOCTYPE html>
<html>
<head>
<title>Radio Button </title>
</head>
<body>
<form>
Select your Gender: <br>
<input type="radio" name="gender"> Male
<input type="radio" name="gender"> Female
<input type="radio" name="gender"> Other
</form>
</body>
</html>
Output

Creating Drop Down List
Drop down list create करने के लिए आप <select> tag use करते है। इस tag को HTML form tag के अंदर define किया जाता है। ये tag drop down list का structure create करता है।
Drop down list की values define करने के लिए <option> tag को define किया जाता है। आप जितने list item add करना चाहते है उतने ही <option> tag define करते है। <option> tag को <select> tag में define किया जाता है।

Output

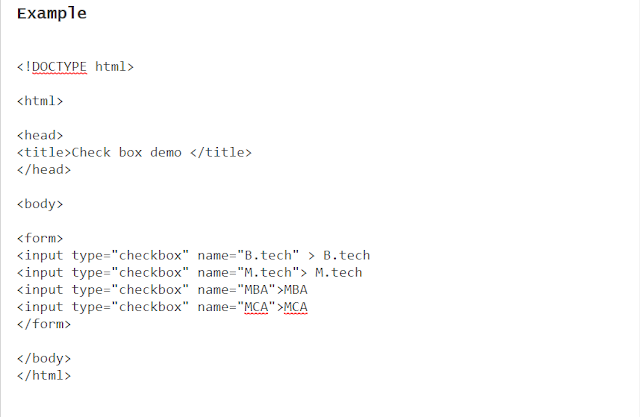
Creating Check
Boxes
Check boxe के द्वारा किसी भी user को multiple option को choose करने के facility
दी
जाती है। जैसे की यदि आप चाहते है की user multiple courses choose करे तो आप check
boxes create कर
सकते है और user उन्हें select कर सकता है।
Check boxes क्रिएट करना बहुत ही आसान होता है। इसके लिए आप
<input> tag के type attribute में checkbox value देते है और Name
attribute में checkbox
का
नाम देते है। attribute की value भी आप दे सकते है।

Output

This is dummy text. It is not meant to be read. Accordingly, it is difficult to figure out when to end it. But then, this is dummy text. It is not meant to be read. Period.
ConversionConversion EmoticonEmoticon